How to Make Gothic Spider Hair Spikes - Upcycle Chic Demo

DIY Gothic spider hair sticks

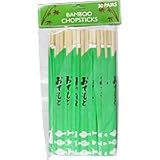
Chopsticks are for more than just eating.
Not only can they make awesome hair pieces and of course, help us gobble up goodies, but they also can be effective weapons. Not to mention the fact that the wooden ones could dust a vampire. They are really most useful creations.
Do you ever want something a little different? Let's do DIY with an edge.
This article will show you how to make the rather Gothic looking spider hair sticks in the picture. Halloween is coming up really fast this year.
I was thinking about making something kind of spooky for the season while dusting the DVD shelf.
By chance, I picked up my copy of Memoirs of a Geisha and got hit with the strangest idea.
I do that. Do you?
The idea of making Japanese inspired hair pieces with a spooky vibe spawned in the old noodle.
They came out scary. That's for sure.
One of my favorite things about this project is that it used some of the chopsticks I have laying around that serve no purpose. I suck at using them but love Chinese food.
They stack up. Finally, I now have a use for them.
Let's give it a gander and see just how these spiders got hatched.
Scary spider on a pretty hand fan hair piece.

Spider, web and smaller spider hanging from chain on hair stick.

The tools needed to make scary spider hair sticks:
Drill
Glue gun
Toothpick
Scissors
This is a very simple project that takes no skill and not much time.
Kids ages seven and up could easily do this project. The directions provided here will cover these specific spider sticks but the instructions could be applied to anything thought up.
One could substitute pumpkins, ghosts, witches, fairies what have you, easily.
Personally, I like this as a group project because of the affordability factor. One could easily substitute skewers for the chopsticks. Wooden skewers come in a package of one hundred for less than a dollar.
The spiders used also come in packages containing multiples stretching the crafty type dollars. Lastly, the tiny little stickers used for the eyes come in packs containing hundreds for pennies per sticker.
For classes, parties, group gatherings and such, this would be a fast, fun project resulting in usable stuff along with the smiles.
Round sticks have to be drilled but flat ones could be punctured with a tack.

Let's do the hardest part first.
The first step is to drill the little holes through the tops of the chopsticks. One could avoid this step by using flat chopsticks. Just push a pin or tack through the flat ones and you are good to go. These are the round ones.
If doing this with groups or children, drill the holes in advance.
Measure down half an inch on each stick. Make a mark using a pencil. Carefully, with a very small drill bit, drill the hole through the center of each stick.
Hair sticks are the only way to wear spiders for the spooky.

The materials needed:
- Chopsticks
- Ribbon and netting
- Paper
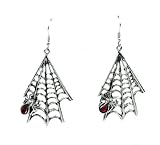
- Web earrings
- Plastic spider
- One gem
- Two pony beads
- Mod Podge, glitter (optional)
First up after putting the holes in the sticks is to cover and carry.
Cover the table you, the kids or the group will be working on to make clean up easy when done. Old newspaper, towels, whiteboard, whatever will work well for this.
Carry over all your supplies from where ever they are hiding. If you are anything like me, chances are high you're going to change the plan at some point so more is better. Just stick to a few colors and a theme.
The basic components of the hair sticks

Cheap craft paint and Mod Podge make for a quick, sleek look

Paint the sticks
I painted these with a simple acrylic, grey, craft paint. You could cover them in glitter, ribbon, fabric, many things. Just be sure that whatever you decide on will be flat after being sealed.
No one wants a hair stick that catches in their hair. That leads to breakage, highly undesirable.
Once painted, be careful where you rest them for they may stick to the surface. I reuse plastic food container lids for the paint. The wet sticks sit atop the rims nicely and can be rotated every minute or two until dry to keep from sticking.
These took two coats.
Do you need some chopsticks for this project?
Simple folded paper fan tops the spider stick

How to make the fan.
This is so simple. It's like being a kid again. Remember on those hot days when you folded paper into a fan? We are going to do the exact same thing here.
I used a sheet of decorated paper out of a book of coordinated, thicker scrapbook paper. Ironically, it came with two sheets of really thin, almost vellum type paper in the front. This was one of them. I really liked the somewhat opaque quality.
Cut the paper to a bit taller than the spider but leave it the full width. Fold the paper using roughly half inch creases flipping it over each time you make a fold. Crease it really well.
Hand fan trimmed in black fishnet and ruffles for top of Gothic spider hair stick

To finish up the fan, we use ribbon, glue and a gemstone.
Once the hand fan is folded, gather the bottom and secure it with ribbon. I used a hot glue gun to do this but it could be just as easily done with beading wire, pronged studs or even a stapler.
A gem stud was glued front and center over the ribbon at the bottom.
To each end on the sides was glued down a piece of black velvet ribbon that matches that around the bottom. Under the velvet ribbon, on the bottom of the fan is a piece of black ruffle ribbon with fish net.
How to keep the fan open.
The fan is naturally going to want to close too much to look good. To keep it more open wide so as to frame our spider better, simply use a bead of hot glue to affix it to itself on the side.
Be careful not to pull too much at once or the paper may tear on the crease.

Perfect spider earrings for this project
How to make the hanging spider and webbing on hair sticks.
You could hand string a spider or web or whatever you wanted with beading or floral wire.
I didn't have that kind of patience, so used a cheat.
These are a pair of super cheap Halloween themed earrings picked up at Wal-Mart.
All you do is thread the back of the earring through the hole drilled in the chopstick, just like you were putting it on.
Push a pony bead over the top. Wrap the earring back wire around the stick and voila, done.
Using the hot glue gun, attach the plastic spider and glue the whole thing to the stick itself.
It doesn't get much faster or easier.
The spider's eyes are nail art stickers

How easy is it?
How to do the finishing touches.
The fan was super soaked in spay on hairspray then given a sprinkling of silver, red and purple glitter, mostly silver.
The netting at the bottom was snipped here and there to give it a somewhat frayed affect.
Nail art rhinestone dots and stars were added to the spiders for eyes.
The entire thing minus the spiders was given a good coat of Mod Podge and let dry.
Make a wish, give it a little dry time and before you can eat a brownie, one Gothic spider set of hair sticks via crafty goodness.
How about a few tips and tricks for chop sticks hair dos?
Four Simple Chopstick Hairstyles was created by Evelina and is curated content from Youtube.
The creepy and crawly come out this time of year.
What do you think is the scariest creepy crawly critter?
Spooky up your do for the scary season too.


All of the images found here are my own photographs taken while making the project shown.
The spider on this hair stick has stars in his eyes.

© 2014 Rhonda Lytle


